The Best Go-To Sugar Cookie Dough Recipe For Cookie Cutters & Stamps
Discover our top-rated sugar cookie dough recipe perfect for cookie cutters and stamps. Get clean edges, crisp details, and soft cookies every time with step-by-step instructions.
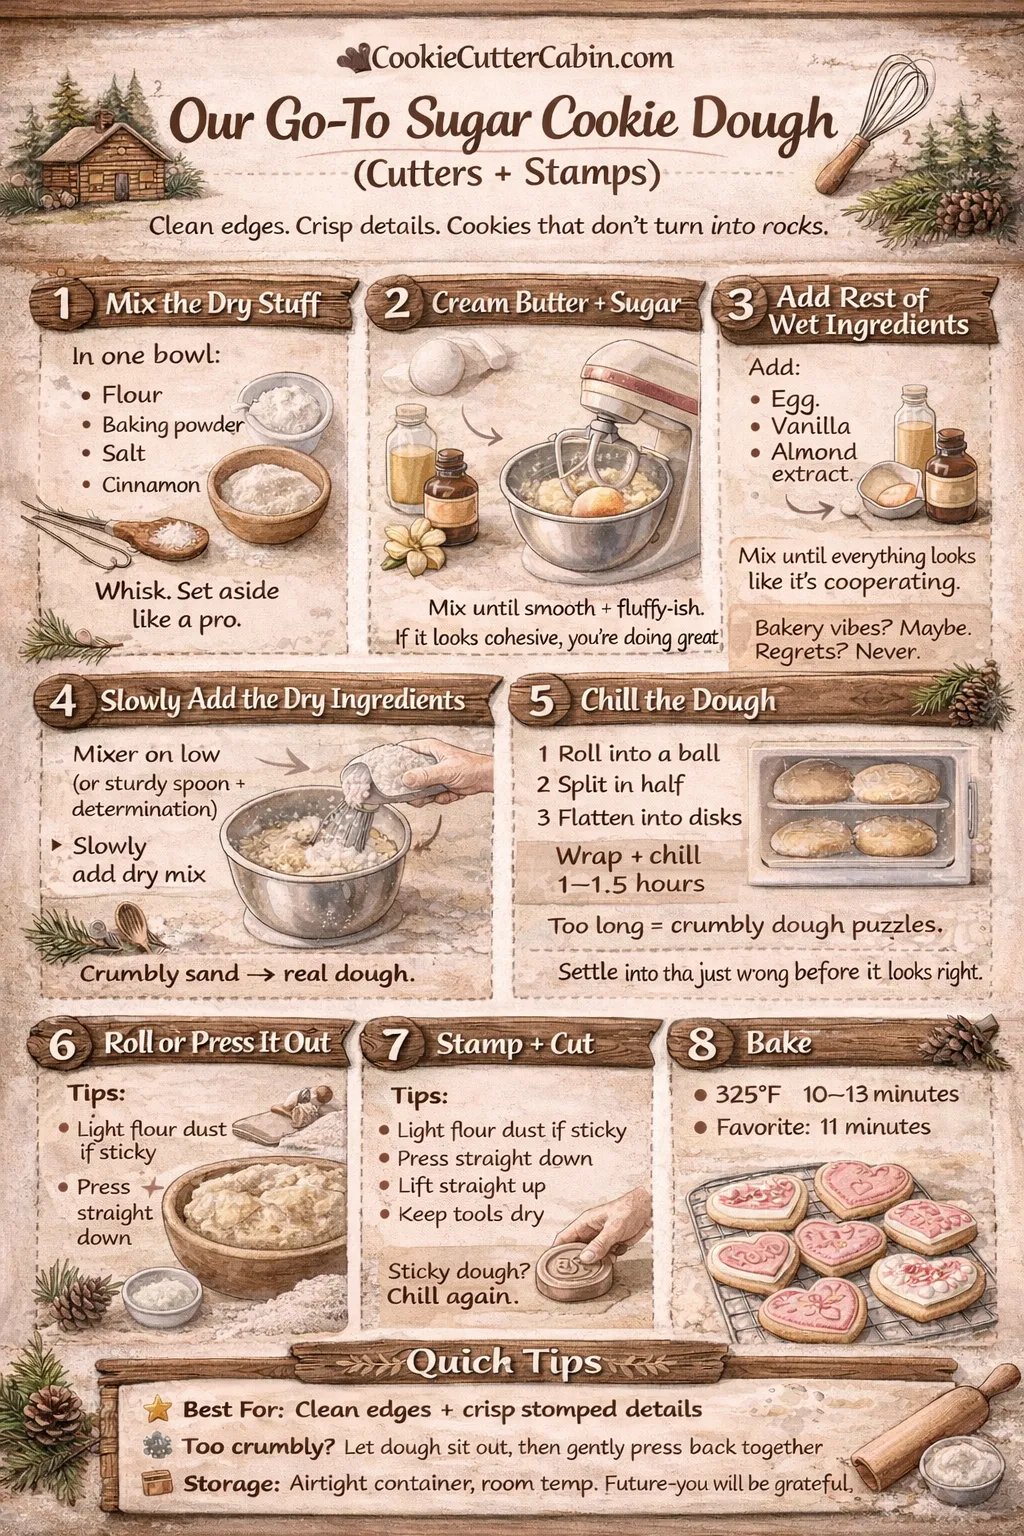
TL;DR (Too Long; Didn’t Roll)
- Mix most dry ingredients in one bowl, butter + sugar in another bowl, then the rest of wet ingredient with it. Add dry to wet slowly.
- Chill the dough 1 to 1.5 hours (don’t forget it in there for 12 business days unless you enjoy crumbly dough puzzles).
- Roll/press to your preferred thickness (we go a little thicker for softer cookies).
- Stamp and cut, then bake at 325°F for 10–13 minutes. Our sweet spot is 11 minutes.
What This Post Is (and Isn’t)
This is our current favorite sugar cookie dough for cookie cutters and stamps. It’s the dough we want when we’re looking for:
- clean edges
- crisp stamp details
- and a cookie that’s not rock-hard the second it cools
It’s not the only way. It’s just the way that’s working for us right now and we’re not mad about it.
Ingredients
- 2 cups all-purpose flour (spooned and leveled), plus more for rolling
- 1 cup granulated sugar
- ½ teaspoon baking powder
- ¼ teaspoon salt
- 1 teaspoon ground cinnamon (Optional)
- ½ teaspoon almond extract
- 8 tablespoons (1 stick) unsalted butter, room temp
- 1 large egg
- 1 teaspoon pure vanilla extract
- 1 teaspoon almond extract (Optional)
Step 1: Mix the Dry Ingredients
In a medium bowl, whisk together:
- 2 cups of flour
- ½ teaspoon of baking powder
- ¼ teaspoon of salt
- 1 teaspoon of cinnamon (still optional)
Set it aside and let it feel important.
Step 2: Cream Butter + Sugar (Until It “Feels Right”)
In a larger bowl:
- Add your room-temp stick of butter & 1 cup of sugar
- Mix until it’s well combined and looks a little fluffy-ish.
We’re not chasing perfection here. If it looks smooth and cohesive, you’re winning.
Step 3: Add the Wet Ingredients
Add in:
- egg
- 1 teaspoon vanilla extract
- 1 teaspoon almond extract (still optional)
Mix again until everything looks like it’s cooperating.
The almond extract note
We add almond extract because we think it helps and gives “bakery vibes”… but if we’re being honest, we can’t tell a huge difference. Still doing it. Flavor is a journey.
Step 4: Slowly Add the Dry Ingredients (This Is the Workout)
With the mixer running on low (or with a sturdy fork + determination):
- Slowly pour the dry ingredients into the wet
- Keep mixing until it becomes dough
It will start as “crumbly sand” and then suddenly become “real dough.” Trust the process.
Step 5: Chill It (But Don’t Forget It)
- Form the dough into a ball
- Split it in half
- Smash each half into a flat disk, about ½ to ¾ inch thick
- Wrap or cover
- Refrigerate for 1 to 1.5 hours
Our very important note: Don’t leave it in the fridge forever. It’s fine, technically… but it can get more crumbly and harder to work with than it needs to be.
Can you freeze it?
Apparently yes. Have we tried? Not yet. We’re very much “eat cookies as you make them” people.
Step 6: Roll/Press It Out (A Patience Optional Zone)
When you pull the dough out, you can let it sit 15–20 minutes to soften a bit.
Do we always do that? No. We have a patience problem. We usually start flattening immediately.
Thickness tips
- Want a softer cookie? Roll a little thicker (this is what we do).
- Want sharper stamp detail? Slightly thinner can help but don’t go paper-thin.
Step 7: Stamp + Cut Your Cookies
This dough is made for the fun part.
Use your favorite cutters and stamps (we obviously love ours 😄): Cookie Stamps Collection
If you want a quick walkthrough of stamping order (stamp→cut vs cut→stamp), this post is your best friend: How to Use Cookie Cutters and Stamps Together
Shop our full collection on Etsy.
Quick stamping tips (so your dough doesn’t cling like it’s emotionally attached)
- Light dusting of flour if needed
- Press straight down, lift straight up
- If things get sticky: chill the dough a bit more and keep your tools dry
Step 8: Bake
- Place cookies on parchment-lined tray
- Bake at 325°F for 10–13 minutes
- Our sweet spot: 11 minutes
We like 11 minutes because:
- they won’t feel super stiff coming out
- and as they cool, they settle into that “perfect cookie texture” zone
(Every oven is a little chaotic. Start checking around 10.)
Step 9: Cool, Taste-Test, Decorate
Let them cool. Then:
- try one (this is non-negotiable)
- decorate your creations
- admire your work like you’re on a baking show
If you’re building themed sets, these are fun places to browse (and we’ve got a guide on baby shower cookie themes if you need ideas):
Baby Shower Cookie Cutters & Stamps
Storage Notes (Because Future-You Deserves Nice Things)
- Store baked cookies in an airtight container at room temp.
- If they soften too much, a quick uncovered rest can help them firm up.
- If your dough gets crumbly from chilling too long: let it sit out a bit, then press/roll gently until it relaxes again.
FAQs
Can I skip the cinnamon? Yep. It adds a cozy little warmth, but you can leave it out if you want a more classic vanilla vibe.
Can I skip the almond extract? Also yes. Vanilla alone still makes a great cookie.
Why is my dough crumbly? Usually: too cold or too long in the fridge. Let it sit out a bit and it becomes much easier to work with.
What’s the best thickness for stamps? Whatever gives you clean detail and the texture you like. We tend to go a bit thicker for softness and just chill the dough if the stamp starts sticking.
Can you make me a custom cutter/stamp for my theme? Yes please. That’s our favorite kind of message.
Soft Close
If your cookies come out a little wonky on batch one, congrats, you’re officially doing it right. Make another tray, adjust one thing, and suddenly you’re “someone who makes stamped cookies.”
Want a seasonal twist? Our St. Patrick’s Day rum cookie dough takes this same recipe and upgrades it with doubled cinnamon, rum flavoring, and optional green food coloring.
Looking for easy decorating ideas? Our shamrock cookie decorating guide shows five beginner-friendly techniques — no royal icing or piping bags needed.
Planning a first birthday? Our first birthday cookie themes guide shows how to use this dough with stamps for easy Wild One and One Happy Camper cookies.
And if you make this recipe, tag us, because we love seeing what you’re stamping.
Share this post:
Related Posts
The Best 2026 Cookie Decorating Trends With Cookie Cutters
Discover the cutest cookie cutter decorating trends for 2026, from minimalist designs to bold cookie stamp textures and everything in between.
Cookie Stamps for Beginners: Everything You Need to Know
Learn how to use cookie stamps for beginners. Discover the basics, step-by-step techniques, and pro tips for clean, professional-looking stamped cookies.
Cookie Stamps vs. Cookie Cutters: What's the Difference (And Which Do You Need?)
Cookie stamps and cookie cutters serve different purposes. Learn the key differences, when to use each, and why a stamp-and-cutter combo gives you the best results.